
Routes
Admin → Routes is where you can manage settings related to your routes.

1. Route Details
- Route selection and ordering. Select a route to edit its properties on the right. Use the up/down arrows to drag routes into the order you want.
- Department Filter. Use this drop-down to filter routes by department.
- Name. The name of the route.
- Departments. The list of departments that this route will be associated with. This association impacts several features in zr ware™. A route can be associated with more than one department. Customers will only be able to book services on this route that belong to the selected departments.
- Text Color. The color of the text used to display the name of the route.
- Background. The background color used when displaying the route in zr ware™.
- Start & End Times. The start and end times used for the route. Unavailable times will be displayed on the map view. These times will be considered when bookings are created in the online scheduler. See this article for details. Please Note: Changing the start and end times of a route will affect every day going forward.
- Default Technicians. This setting allows you to set the default technician(s) for this route. Doing so allows you to apply the default assignment to any given day on the map view.

2. Full Day Closures
Click the Full Day Closures tab if you would like to close a full route for a specific day
Use the calendar to select the date of the closure
Place a checkmark in the box next to the route that you would like to close for the day. This will update the capacities and nothing can be scheduled on that route for that day
Click Save Full Day Closures

3. Closure Blocks
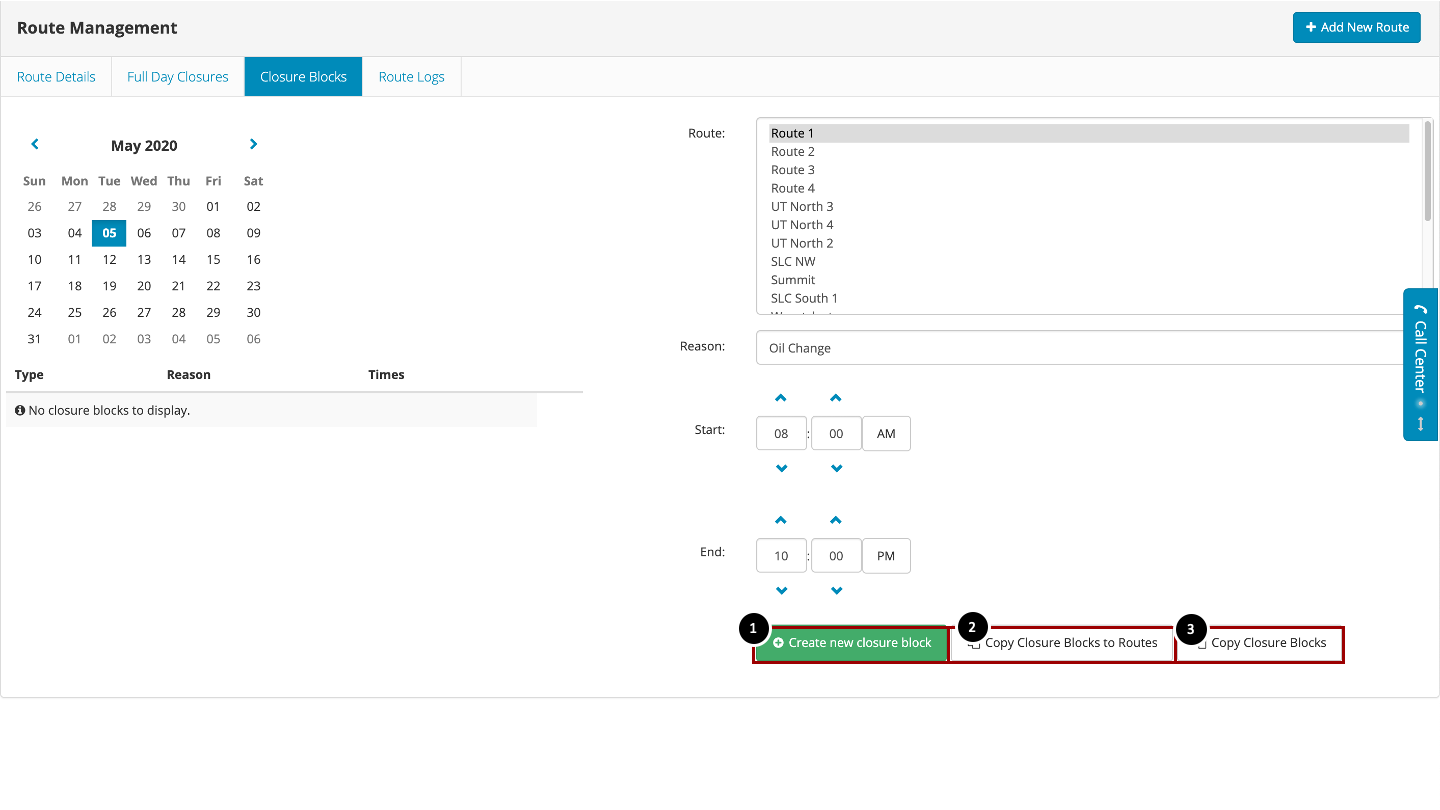
The Closure Blocks tab will allow you to block off a certain schedule for a selected period of time.
When copying closure blocks onto other routes or onto other days, the selected calendar date on the left-hand side of the screen will be used to copy settings from.
 3.1 Create new Closure Block
The Closure Blocks tab will allow you to block off a certain schedule for a selected period of time.
For example, if the tech assigned to schedule 3 needs to attend a meeting in the office on September 17th, you would select the date in the calendar and then select the route you need to block.
Enter a reason for the closure block
Enter the start and end times
Click Create new closure block

Back to Create New Closure Block
3.2 Copy Closure Blocks to Routes
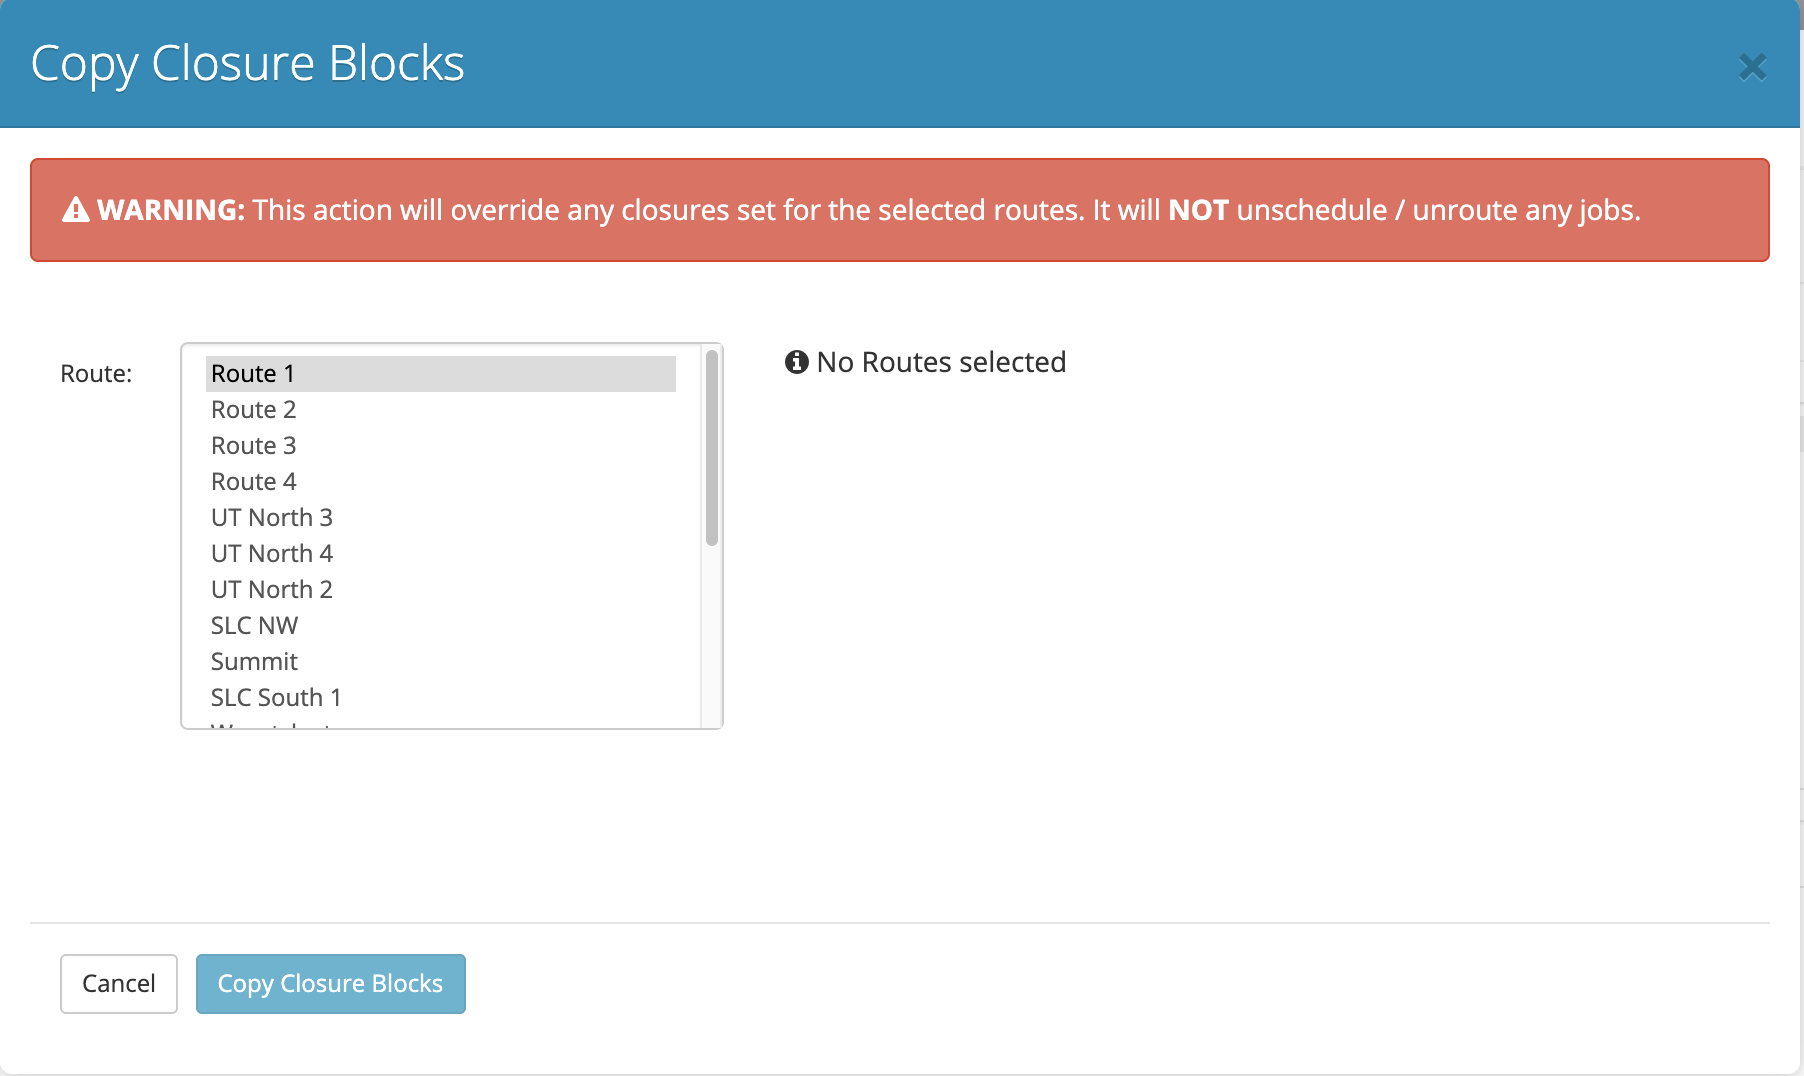
In the popup that appears, select the list of routes that you want to copy the closure blocks onto for today only, then press "Copy Closure Blocks".
Back to Create New Closure Block
3.3 Copy Closure Blocks
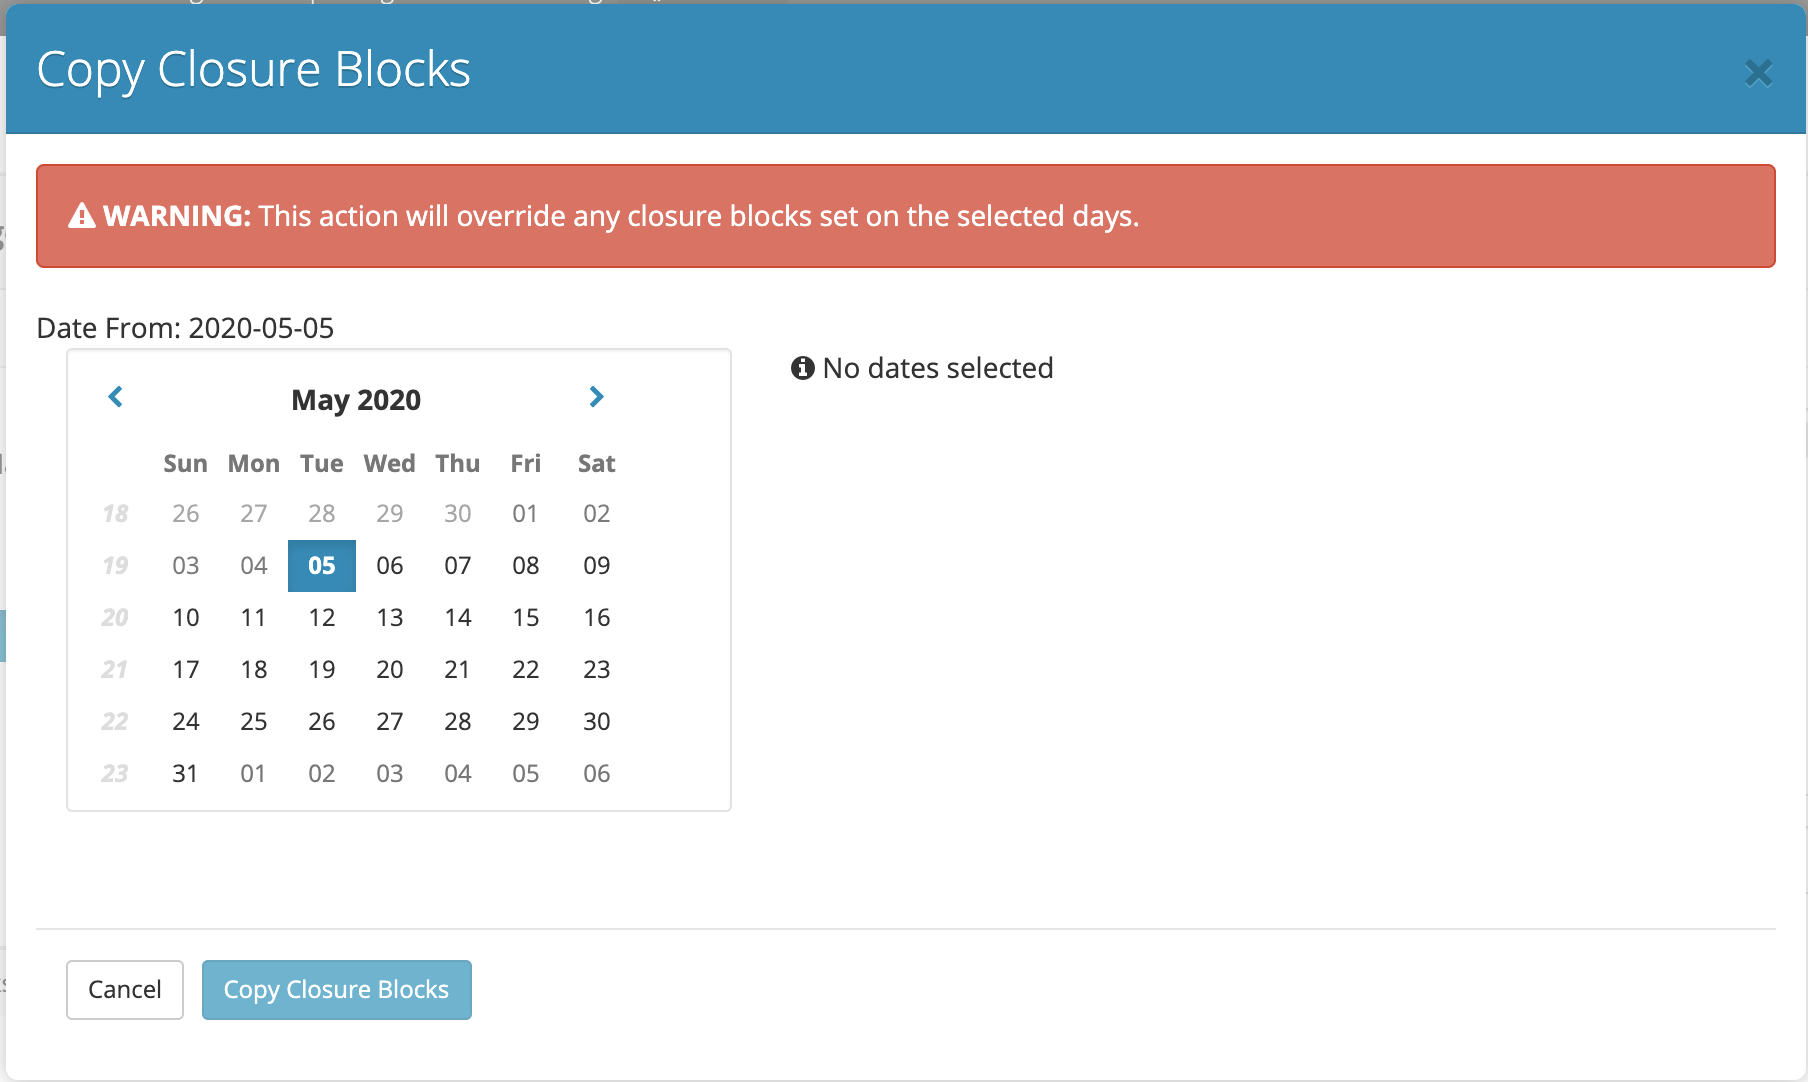
In the popup that appears, select the days that you want the selected day's closure blocks to apply to. Then click "Copy Closure Blocks". This will copy closure blocks for every route to each corresponding route on each of the selected days, using the selected date's current settings.
4. Route Logs
- View Logs. Click on the name of a route to view the logs for that route.
- View Logs by Date. Select a date to view only logs that occurred on that date.
- View all Logs for Route. Check this box to view logs from all time.
- Filter Route Names. Use this field to filter routes by name.

Some actions that are logged here:
- Technician assignments
- Vehicle assignments
- Full Day Closures
Comments
0 comments
Please sign in to leave a comment.