

Video walkthrough provided here
Index
- What is Capacities?
- Where do I find the Capacity V2 page?
- How do I set up and/or manage Capacities V2?
What is Capacities?
Capacities is where you set up what Routes are going to service each Zone. All bases that use the online scheduler or the Intelligent Booking Feature need to set up Capacities.
Capacities V2 is a simplified version of the Capacities page. The Capacities and Capacities V2 pages are interchangeable and both can be used to set up your capacities. The Capacities V2 page also introduces the concept of Date Presets. Date Presets allow you to set certain capacities for each day of the week and have those presets continue indefinitely or until a user changes them.
Please make sure you have your Arrival Windows , Routes, and Zones set up prior to setting these Capacities.
Where do I find the Capacity V2 page?
Go to Admin > Capacities and then click on the link provided at the top of the Capacities V2 page.

How do I set up and/or manage Capacities V2?

- Create/Edit or select an existing Date Preset
- Choose what Routes will service each Zone
- Additional settings
1. Create/Edit or select an existing Date Preset

A. Select an existing Date Preset
If you have created any Date Presets, they will show up in the drop down. See image above.
By selecting a Date Preset, the capacities will load with the last saved settings for that Date Preset.
If you have not created a Date preset for the selected day on the calendar, you will see a warning with a link to help guide you on setting up your preset.

B. Manage Presets

Clicking on Manage Presets will open a new box where you can Create/Edit/Delete Date Presets.
- Preset Title - Choose a name for your Date Preset.
- Repeat on - Choose what days will be affected by this preset. Weekdays can only be used once for all presets.
- Delete - Remove the preset. The system will automatically create a placeholder preset when all the presets have been deleted.
C. Calendar View

This Calendar View will let you see the Capacity settings for each date.
2. Choose what Routes will service each Zone
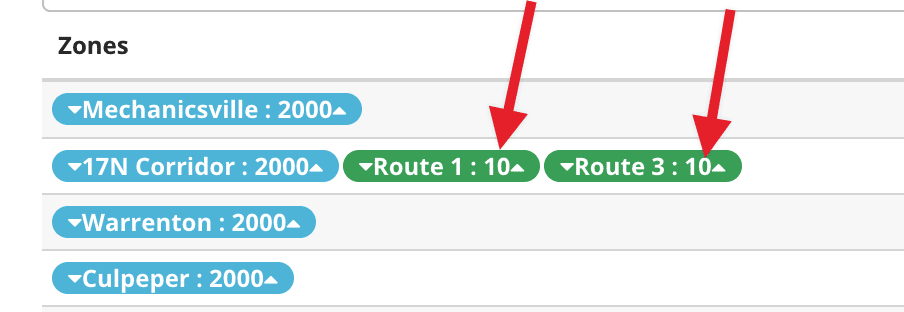
You have two ways to set up what routes are going to be servicing each zone.
Drag and Drop
Select one of your Route blocks and drag and drop it onto the right of the zone you want it servicing. Make sure you drop it in the Route column.
Use the Route drop down

Inside each route block is a drop down arrow. When you click on this arrow it will open up a list of all of the active zones. This view gives you a quick way to assign the route to service multiple Zones.
3. Additional settings

- Clicking on 'Click here to return to the old Capacities' link will return you to the old Capacities view.
- You can use the Filters to filter for Routes and Zones.
- Clicking on the 'Clear All Routes' button will remove all routes assigned to a zone.
- Clicking on the 'Set dynamic width to all blocks' will shrink the blocks.
-
The C in the top right hand corner of a Route Block means that route has a Full Day Closure on it.

- You can not set up Capacities for individual dates from this view.
- Setting job limits for individual routes isn’t needed anymore. You can set the number of jobs for all routes in Admin > Booking & Scheduling.
Comments
0 comments
Please sign in to leave a comment.